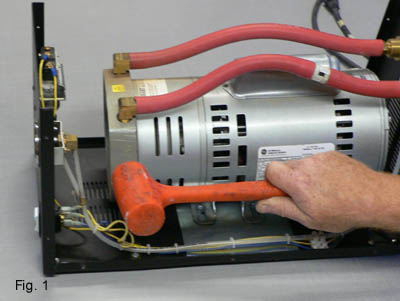
Step 1. To free your pump from vane lock you can first, take a dead blow hammer, or a block of wood and a steel hammer, and give the cast iron end plate three hard hits. Do not use a rubber mallet, it has to much bounce to be effective. See fig. 1 & 2
 |
 |
Step 2. Turn the pump on, if it does not run repeat step 1 while the pump is on and trying to run. Do this quickly to prevent the pump from tripping into thermal overload.
Step 3. If the pump starts to run from either step 1 or 2, put the pump aside and let it to run for two hours nonstop disconnected from the bag. This will help the pump to clean out any corrosion build up.
Step 3A. You may still be able to start the pump without disassembly by jumping to step 6 and loosening these bolts with the motor in place. Do not unbolt the pump from its base at this time. Loosen the six bolts and then finger tighten them. This step removes some pressure from the vacuum chamber. Now repeat step 2.
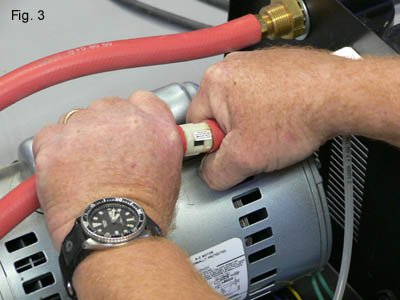
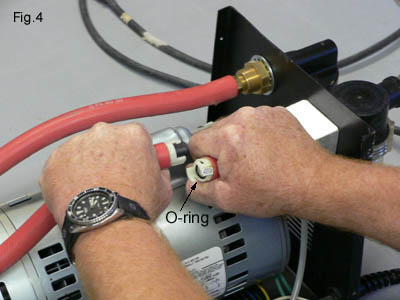
Step 4. If the pump still does not run the vacuum chamber will need to be manually cleaned. Disconnect the back check valve located in the intake hose, give it a one quarter turn and separate the two halves, see fig. 3, 4, & 5. Be aware that there is an o-ring in the base of each half of the back check valve housing. Be sure not to lose this o-ring or the pump will not operate properly when reassembled. If you are working on the 5cfm pump this back check valve is located on the aluminum block mounted to the inside back of the pump.
 |
 |
 |
Step 5. Unbolt the pump from it base. There are two bolts on each side of the pump. Once the pump is unbolted turn it sideways. See fig. 6 & 7.
 |
 |
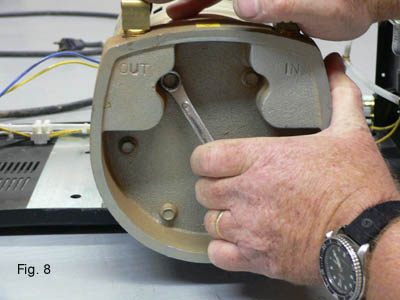
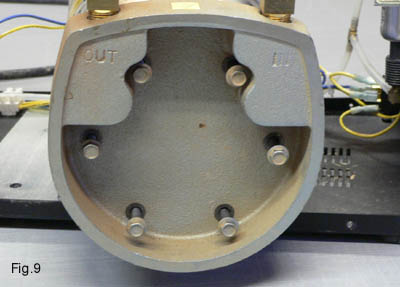
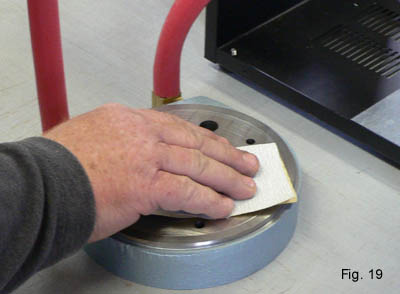
Step 6. Next, remove the cast iron end plate by unbolting the six bolts that hold it on. See fig. 8 & 9.
 |
 |
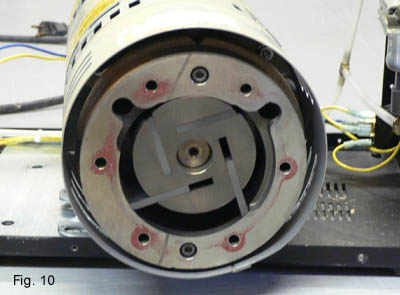
Step 7. You will now be looking into the vacuum chamber. Remove the tin housing. See fig. 10 & 11.
 |
 |
Step 8. There are four slots in the rotor with a carbon vane in each slot. Remove these vanes. Some pumps that have more corrosion may require prying to get the vanes out. Be careful not to break them as they are somewhat brittle. See fig. 12

Step 9. Next, remove the chamber itself by unbolting the two recessed allen bolts. One on the top and one on the bottom of the chamber. See fig 13 & 14.
 |
 |
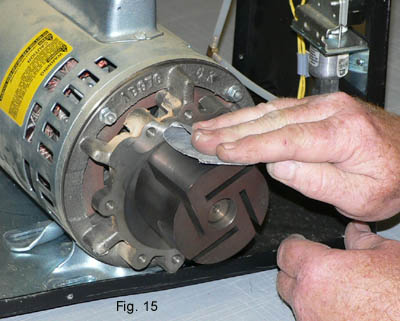
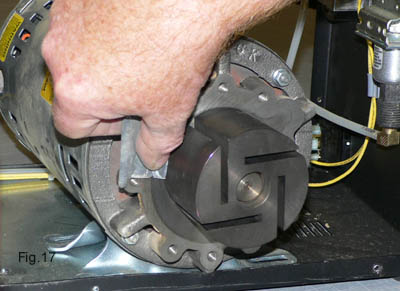
Step 10. Now that the vacuum chamber is completely disassembled, (the rotor itself cannot be removed). The corrosion needs to be removed from all surfaces that make up the chamber. Use 400grit sand paper. Do not use any oil with the sand paper, only dry sanding. Sand until all corrosion is removed and the steel is clean. See fig. 15, 16, 17, 18 & 19.
 |
 |
 |
 |
 |
Step 11. With all parts of the chamber sanded back to bare steel you can start the re-assembly process. The first step is to bolt the chamber back on using the two recessed allen bolts. The rotor and chamber are suppose to come as close as possible to each other without touching to achieve maximum vacuum. Take a piece of paper and place it on the top of the rotor. Next, set the chamber in place so it is resting on this piece of paper. Lightly tighten the allen bolts and then remove the paper shim. Hand turn the rotor to be sure it is not touching the chamber. If you have the proper clearance then finish tightening the allen bolts. See fig. 20.

Step 12. To reassemble the pump follow steps 8 thru 4 in reverse order.
Step 13. Once the pump is completely reassembled allow it to run nonstop for 2 hours, disconnected from the bag to re-seat the vanes and impregnate the cast iron with carbon dust. Your pump should now be ready to run. If you live in a high humidity area, we recommend repeating this 2 hour run time three times a year as a general maintenance procedure.